Welcome to visit:Guangdong Zhongheng New Material Technology Co., Ltd. Official Website

Hot Products
solution
contact us

Mobile:13612626708
Landline:0757-85223839
mailbox:zh@gdzh99.com
Contact:Mr. Li
Add:广东省佛山市狮山镇松岗山南工业区北区三路37号
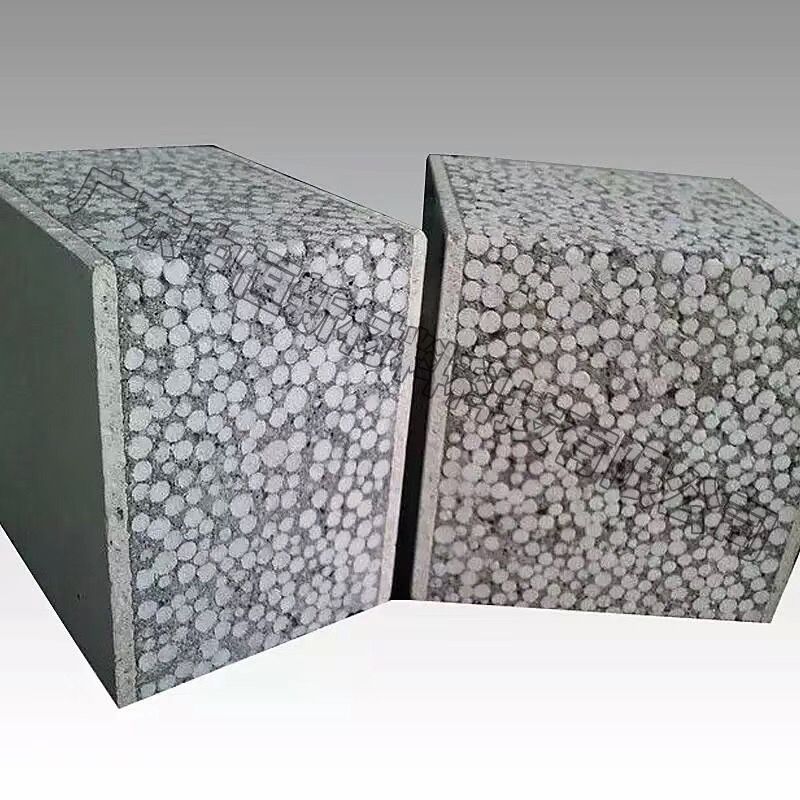
1. Clean the mortar, concrete and debris on the protruding part of the base surface (wall surface, top surface, ground) for leveling treatment. First place the position line on the ground to remove the light board installation.
2. According to the installation diagram of the row board, when the first board is installed, the U-shaped steel card is fixed on the structure with the nail gun or the Φ6 expansion tube screw at the upper end of the light board joint seam to meet the adjacent two. The block board is held in place by a U-shaped steel card. The L-shaped steel card is fixed on the structural wall surface to fix the first plate.
3. Remove the ash from the side of the board at the side of the board. Brush the interface agent on the sides of the board and the top of the board with full scraping adhesive. According to the layout diagram, the installation is sequentially performed from the beginning of the joint of the structural wall. If it is from the door window opening, it should start from the door and window opening to the sides.
4. Align the lower end of the board with the ink line, use the crowbar to gently pick up the board at the lower end of the board, and tighten it with a wooden wedge to make the top end tight. Use a wooden wedge to tighten the bottom of the light board. Then apply the adhesive to the side of the board and the other board is installed as such. Not only the top of the board is compacted, but the two boards are tightly packed with an adhesive. Then use a putty knife to flatten the adhesive on the extrusion surface. Repeatedly, the lower end of each plate is compacted with a wooden wedge. During the installation process, check the flatness and verticality of the wall after installation with a 2m ruler and feeler gauge.
5. After installing the partition wall, after passing the inspection, fill the bottom of the board with C20 dry hard bean stone concrete for about 7 days after 24 hours. When the concrete strength reaches 10Mpa or more, withdraw the wooden wedge and so on with the same strength. Stone concrete fills the void left by the wooden wedge.
6. Lay the wire tube and the wire box. Find the position according to the electrical installation diagram, draw the positioning line, lay the wire tube, and transfer the wire box. The wire and pipe to be installed shall be laid along the hole of the plate and shall not be laid horizontally or diagonally.
7. Slab seam treatment “After the above process is completed, a layer of caulking agent is applied at the joint of the joints of the slats, and the thickness should be 2mm~3mm. At the same time, the caulking tape is bonded to the slats, and the trowel is used. The caulking tape is pressed into the caulking agent. Finally, the caulking agent is used to level the surface with the caulking agent. The joint between the plates is made of 100 mm wide mesh cloth, and the joint between the plate and the main structural wall surface or the door and window opening should be widened. 200nn. After a week, check that all the seams and other plates are well connected to the main structure. If there are cracks, repair them, especially at the corners and corners.
8. Board surface treatment: In order to protect the board surface and the convenience of decoration, it is better to treat the whole board surface after the board is installed and dried. The treatment method usually uses a mesh cloth or a polyester non-woven fabric and a binder or a water-resistant putty to horizontally coat the mesh cloth or the polyester non-woven fabric on the surface of the board, and the cloth is stretched to scrape the water-resistant putty. Adjacent mesh joints are overlapped by 100mm.

service
hotline13612626708

Mobile